Template Fields
The templates fields tab of the importer screen is where setup the link between the file being imported and what parts of the chosen import template.
Table of Contents
Template Field Groups
The fields available for each template are different, fields for each template have been split into groups, for example the post template has Post Fields, Taxonomies, Attachments, and Custom Fields, each group will look similar to the screenshot below.
If you unsure of what the field is, Hover over the ? to display a helpful tooltip.
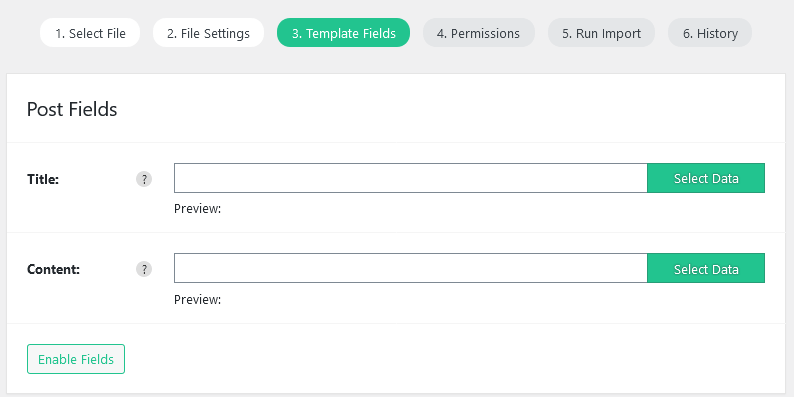
The enable field button, shown bottom left in the screenshot above allows you to enable/disable extra template fields, e.g. Post excerpt, and Post slug…
An in-depth guide on each template can be found in the Importer Templates section of the documentation.
Selecting field data from import file
Each template field allows you to choose what part or parts of the importer file should be used, to do this click on the Select Data button on the right hand side of the field input.
Selecting field data from XML file
Clicking the Select data button will load up the XML Data selector modal, this modal displays a preview of a record from the XML file.
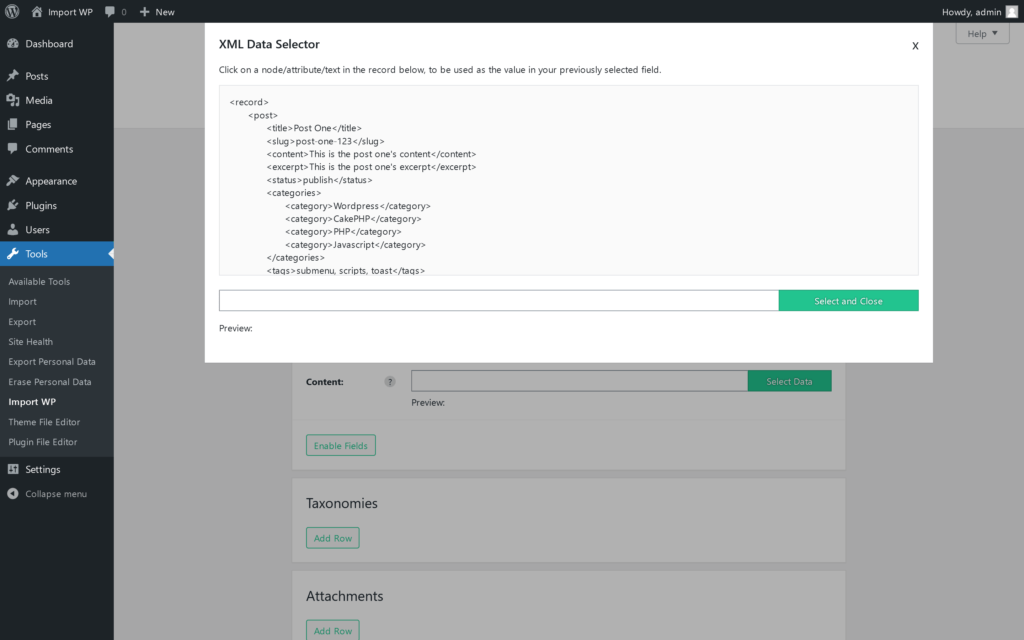
Clicking on a node, text, or attribute from the xml record preview will insert the XML xpath into the input field at the bottom of the modal and update the field preview.

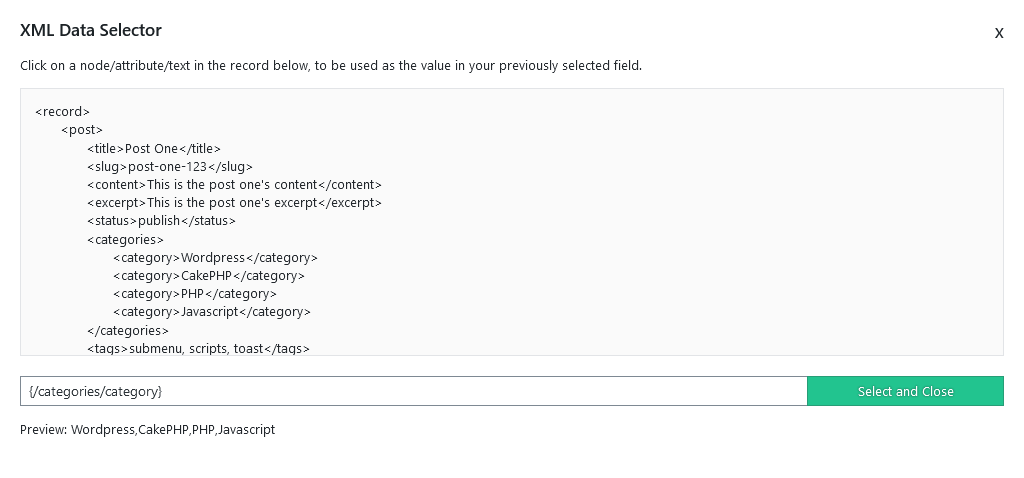
Selecting a node via the XML Data Selector, if the node has multiple siblings with the same name, then clicking on one will automatically select all those siblings as shown in the image below:
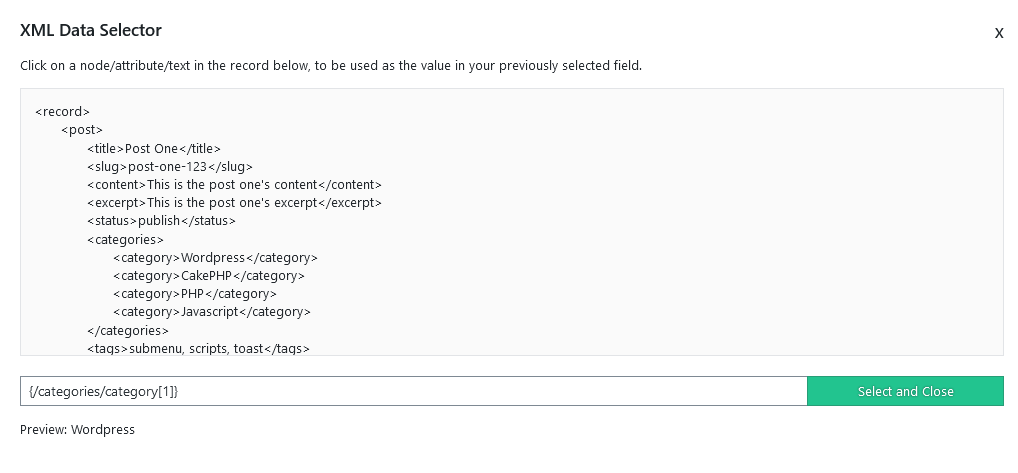
However if you only wanted to select a single nodes value instead of all, edit the generated xpath and enter the node number on the end e.g.[NODE_NUMBER], example shown below:
Selecting field data from CSV file
Clicking the select data button will load up the CSV Data selector modal, You should see a preview of the CSV headings or numeric column numbers in the left hand column, and the first record in the right hand column, each row of the preview represents a column in the CSV file.
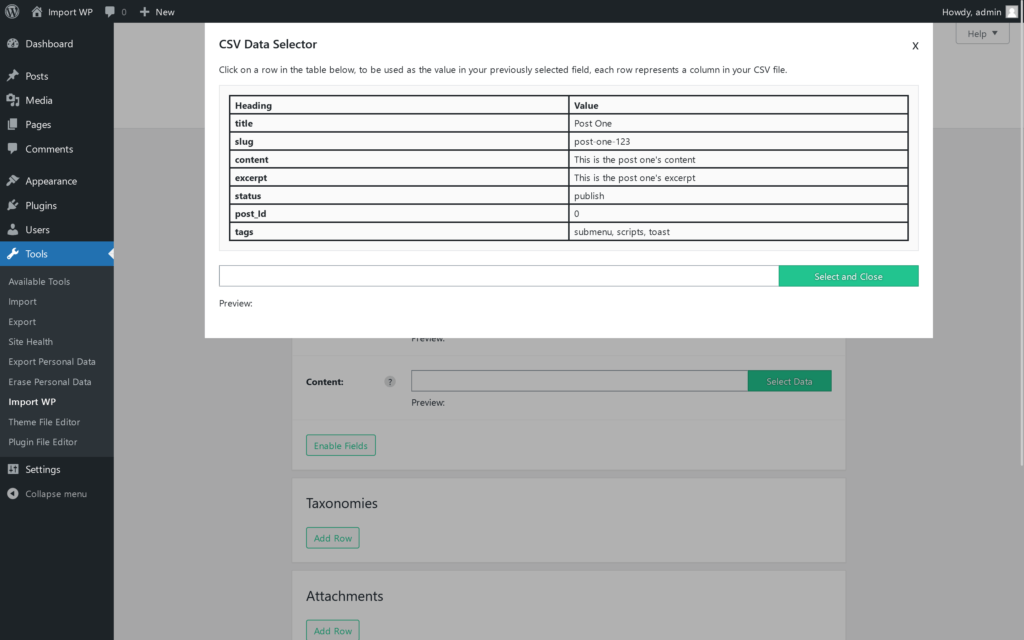
Clicking on a row within the record preview will insert the CSV column into the input field at the bottom of the modal and update the field preview.
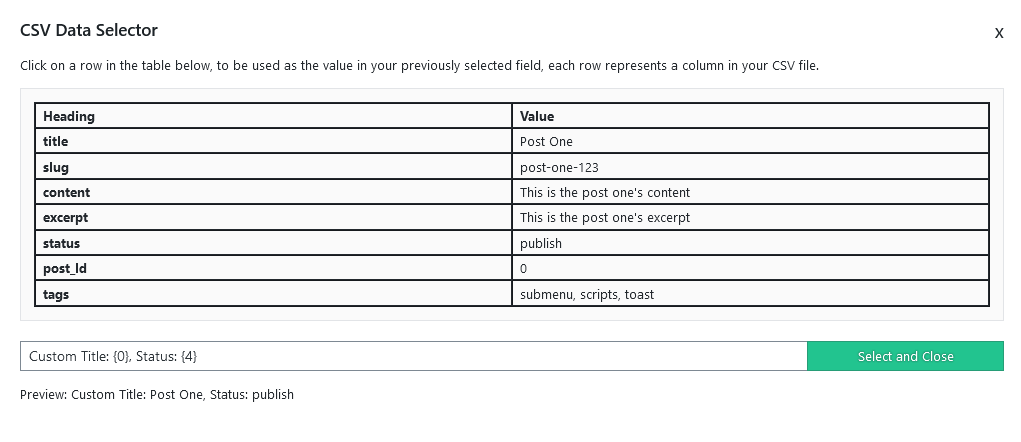
Confirming selection and closing the modal
This input field value at the bottom of the modal will be added to the template when you click on Select and Close. To cancel the selection click on the cross at the top right the modal.
You can add in custom text into the input field, or manipulate the order by moving around the columns {#}.
Mapping fields
Mapping is used when you want the value imported to differ from the value in your file. A field map button can be found to the right hand side of the “Select data” field.

Clicking the grey table icon will display the field map modal shown in the following screenshot.

In this screenshot if the value in the field “Equals” Yes, then it will instead import the value “1”, otherwise if the value in the field does not match “Yes” then it will return “0”.